Feb 23, 2026

How to create a full, print-ready coloring book using AI - without being an artist.
This is for Etsy/KDP creators, teachers, and parents making printables, especially if you’ve never made a coloring book before.
One prompt is enough
In Lifetoon, you don’t need 30 separate prompts to make a 30-page coloring book.
You write one prompt (a theme + characters + vibe), and Lifetoon turns it into:
a character + style setup (so everything matches)
a page-by-page narrative plan (so you’re not inventing ideas all day)
20–30 line-art pages you can generate and tweak
Most AI coloring book workflows fall apart because you end up:
writing a new prompt for every page
fighting style drift
getting characters that look different every time
Lifetoon is built to keep your book consistent:
Character consistency: same character design across pages
Style consistency: the line-art look stays locked
Narrative consistency: pages follow a plan, not randomness
What “character consistency” means (in normal human language)
It means Cookie looks like Cookie on page 1 and page 27:
same face shape
same outfit
same proportions
same line thickness
You’re not “re-rolling a new character” every page. You’re building a cast.
Step 1: Choose your format
1.1. Comic or carousel
Before you write prompts, pick what you’re making. Format controls the layout, page flow, and exports, so if you skip this, you’ll fight the tool later.
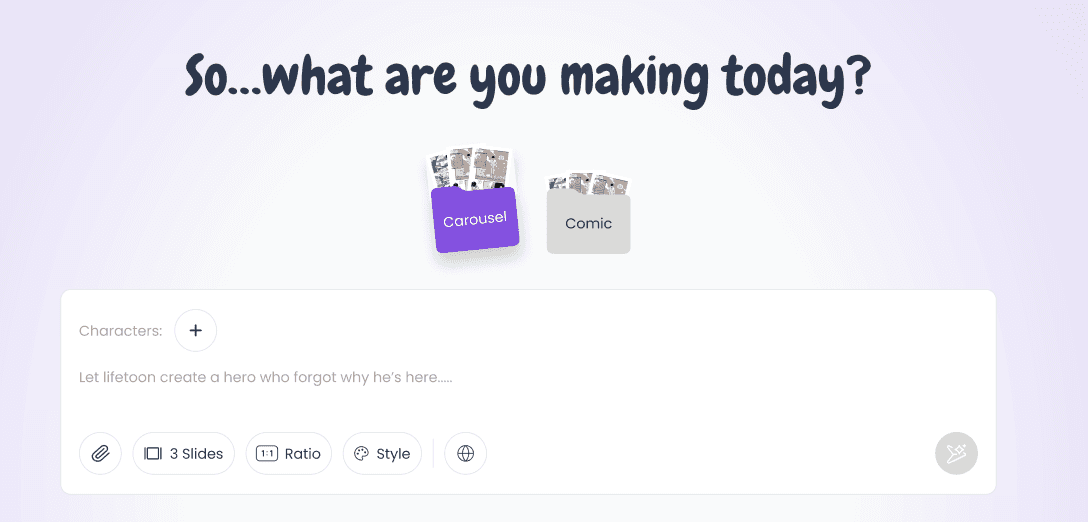
-> Comic = panels + story beats (multiple images per page)
-> Carousel = swipe-style slides (one image per page)
1.2. How many scenes do you want in your story? - 4 / 5 / 10 / 20 / 30
1.3. Aspect ratio / size: what should you choose?
For printing (Etsy printables + home printers)
Best default: 8.5×11 (portrait)
For social posts (not a book): Square: 1:1 | Instagram feed: 4:5 | Reels: 9:16
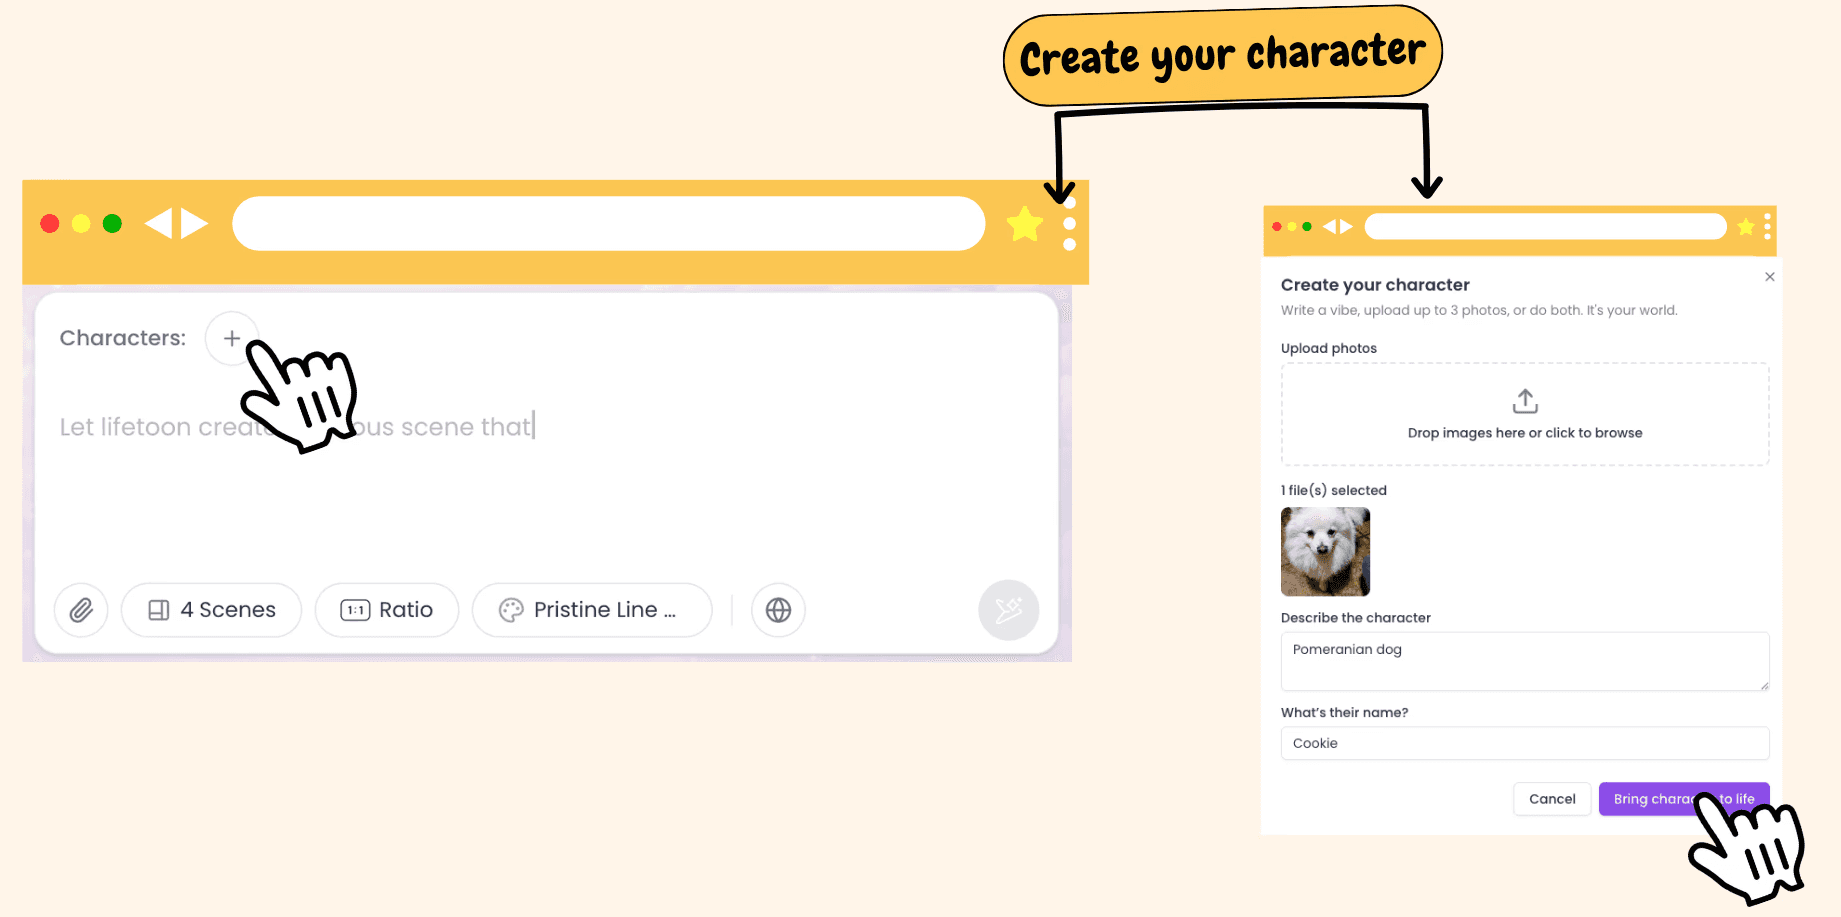
Step 2: Add characters + lock your style
Every story needs a star… and a style guide.
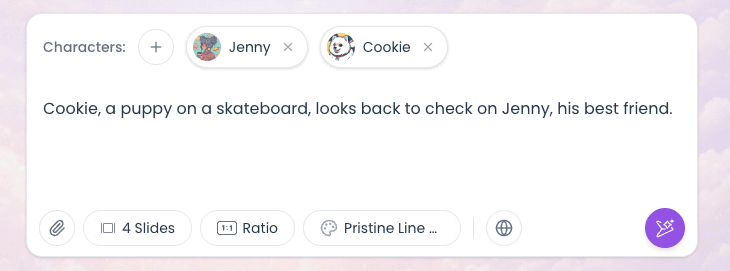
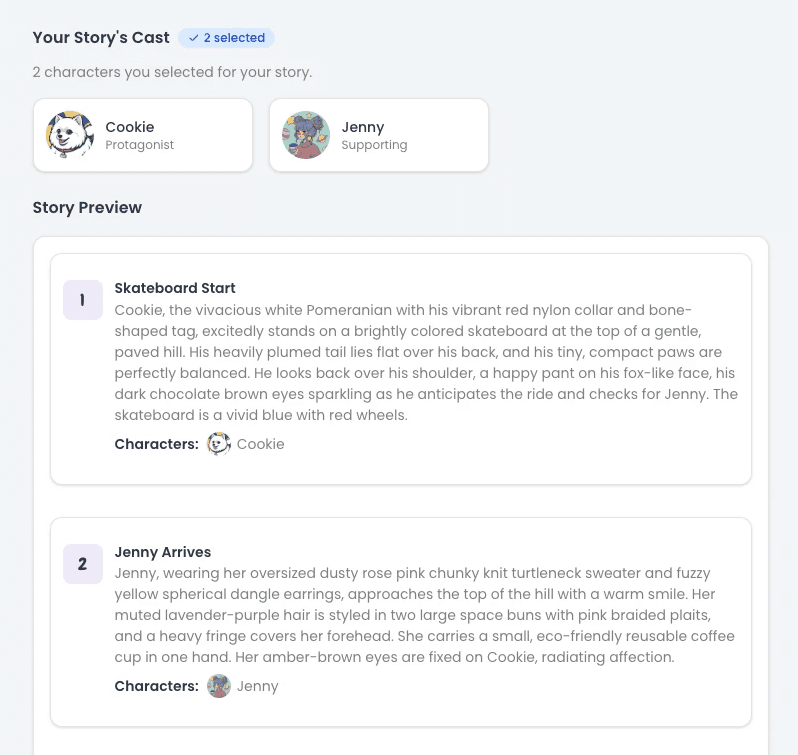
Our: Cookie (my dog) & Jenny.
Our story is: Cookie, a puppy on a skateboard, looks back to check on Jenny, his best friend.
2.1. Character consistency creation
To keep your coloring book consistent, you create your characters once, then Lifetoon reuses them across every scene.
If you already have a character look you like, upload it. Lifetoon uses it as the visual anchor so the character stays consistent from page 1 to page 30.
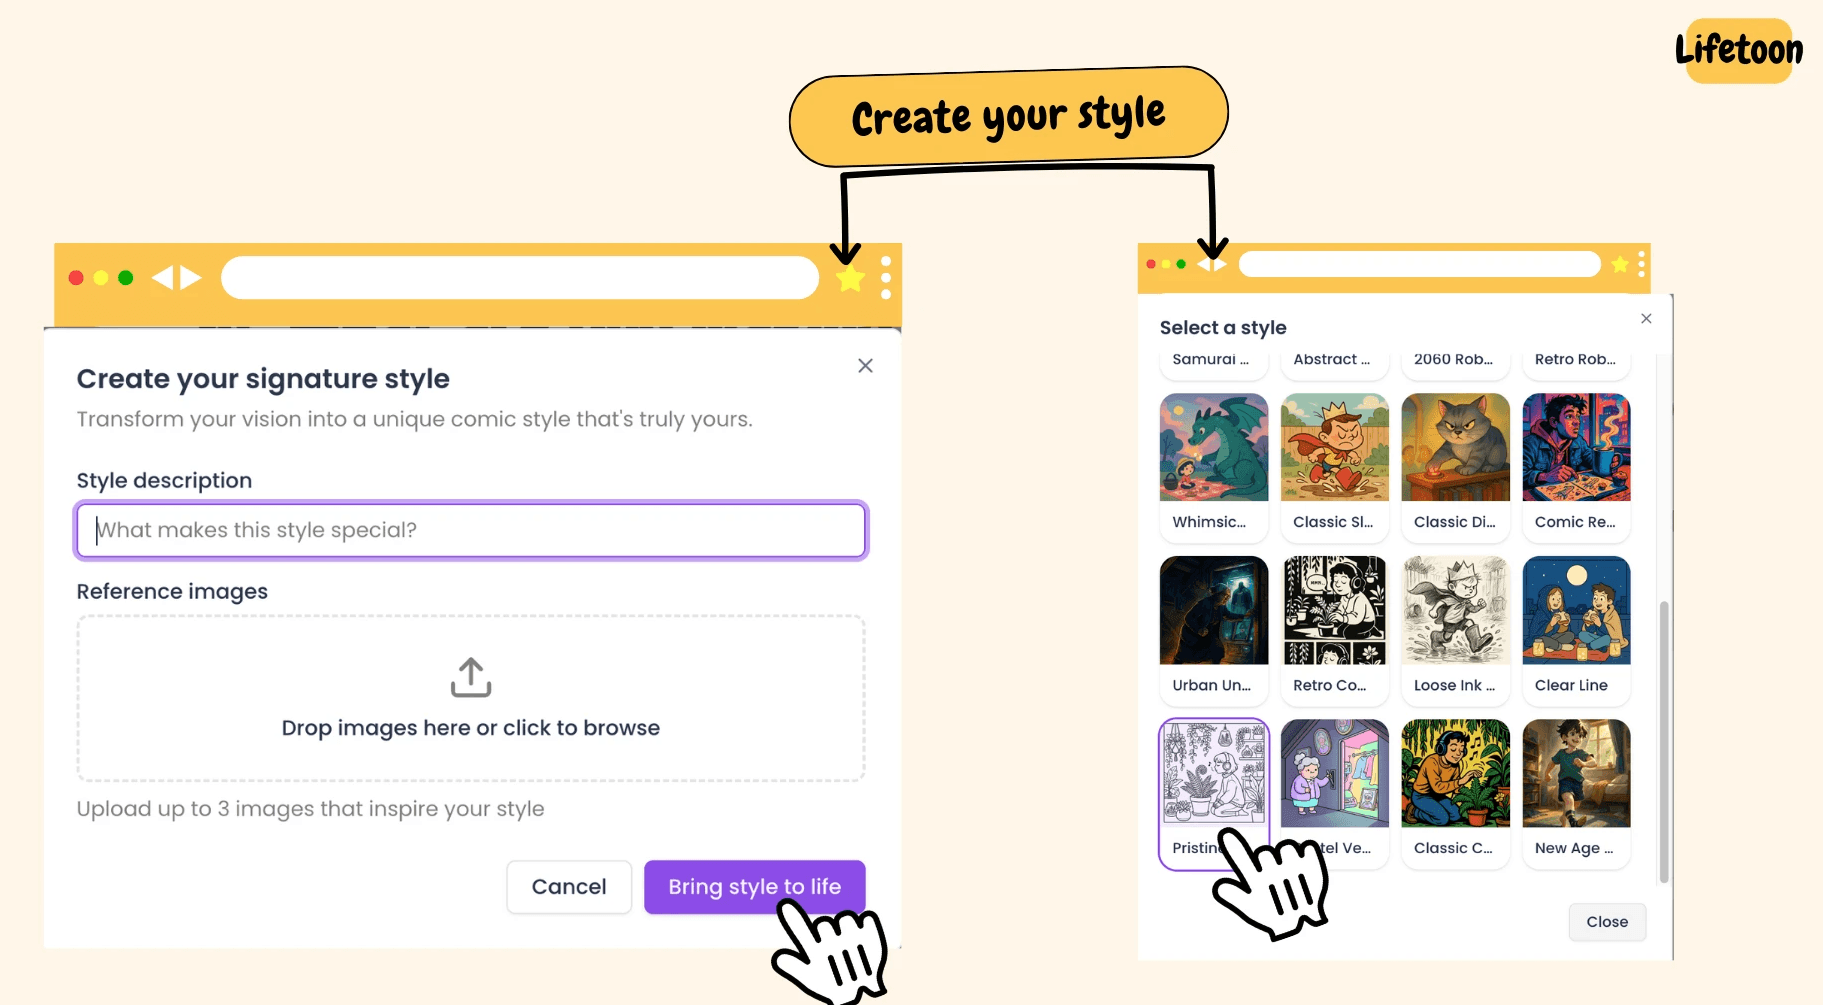
2.2. Create your style (or just pick ours)
After you add your characters, you choose how the whole book should look. Good news: you don’t need to invent a style from scratch.
If you want clean, printable pages right away, pick the default. Want it a little more bold? A little simpler? You can tweak without changing the whole look.
Common tweaks:
thicker outlines
simpler details
less background clutter
bigger open areas for coloring
And .. that's it :)
Next, you’ll review the Preview. With your characters selected, Lifetoon shows you the narrative arc for all scenes. You can edit, reorder, or change anything before you generate the final pages and consume your credits.
Step 3: Generate & Edit
After you approve the preview, Lifetoon generates your pages and drops you into the editor. From here you can fix anything fast, without rewriting prompts or starting over.
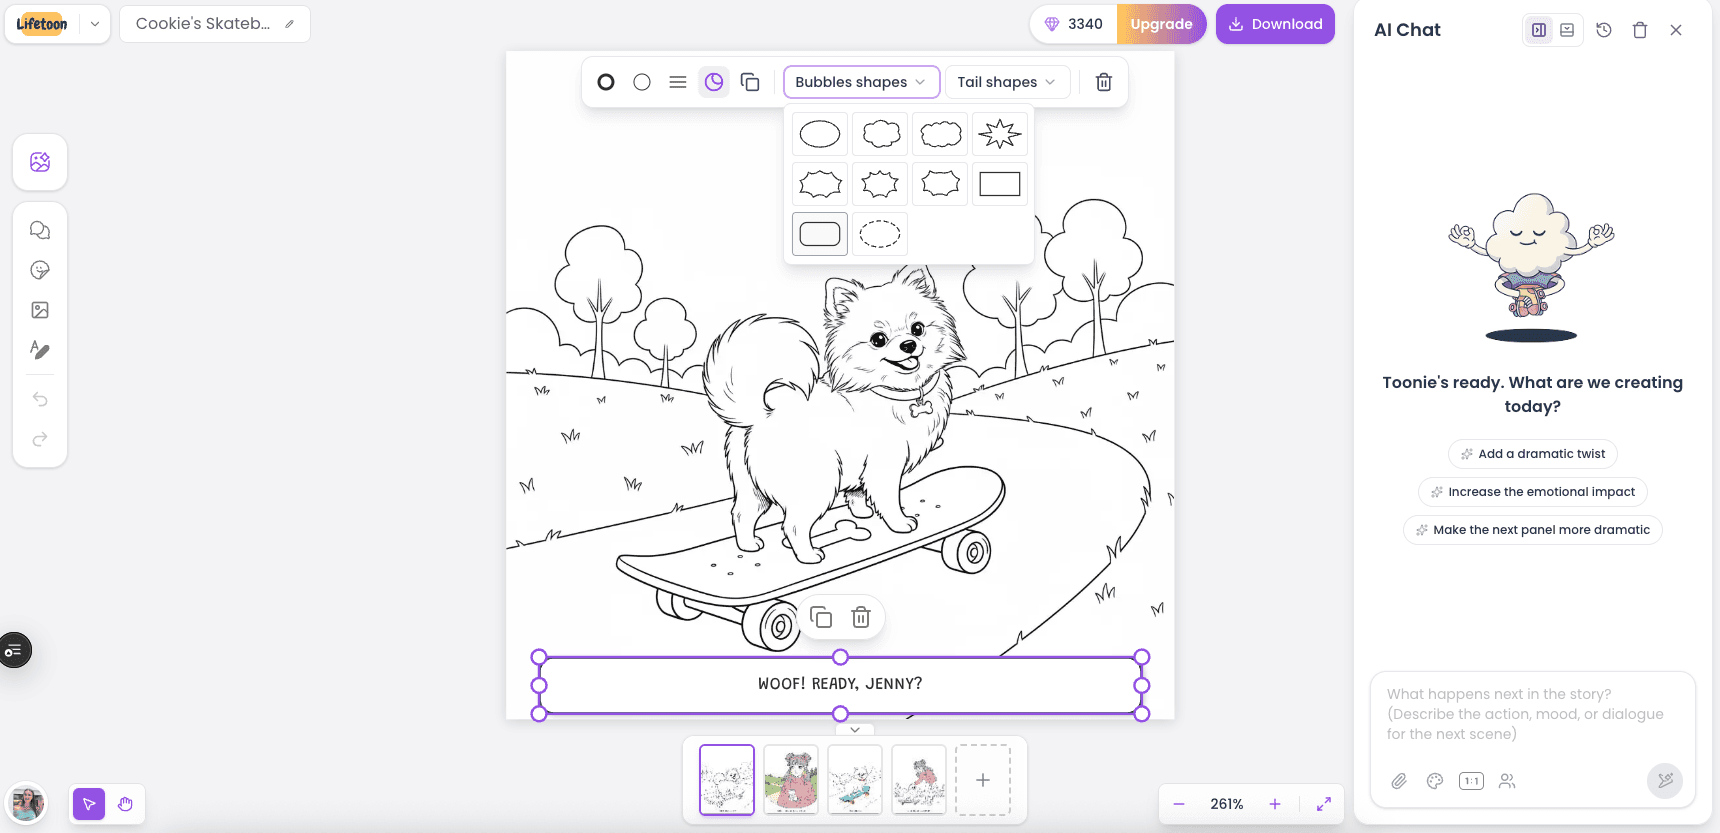
What you can do on this screen
Click any page (bottom thumbnails) to edit it
Edit text (captions/dialogue) directly on the canvas
Add elements like speech bubbles and shapes
Use the AI Chat panel to refine a page with plain-English instructions
Keep the characters and style consistent while you adjust details
If you can write one good prompt, you can make a whole coloring book.
Lifetoon handles the messy parts from character consistency, style consistency, and the narrative plan, so you can focus on making pages that look good and print clean.
Ready? Pick a format, write one prompt, and let Lifetoon build the rest. Create your first book now.